What to think about when it comes to LOD transitions
Introduction
At Simplygon it has always been one of our priorities, to enable you to use the Simplygon SDK as an automation tool kit. To empower you to create workflows that optimizes your content in ways you could not before. To make it run smoothly on less powerful target platforms (low range PCs, mobile devices, previous generation consoles), while creating assets ready for the next generation hardware giving your players the best visual fidelity. With that in mind, you can design your content pipeline so that targeting other platforms is an opportunity, not a problem for later!
Historically LOD budgets have always been set in percentages of the original asset. You would typically want LOD 1 to be somewhere between 50 and 80% of the original asset (depending on where you intend to switch to happen). This approach makes perfect sense in the manual optimization scenario. Optimizing something to a certain poly count is exact, reducing something to look good leaves room for interpretation. There will always be a fight between art and engineering. Art will say that this is all we can do. Engineering will say that the poly count is too high. For every asset.
Balancing the triangle count
The most straightforward way to balance the triangle count is to have LOD-zones at predetermined distances from the camera. The triangle-count can then be balanced by adjusting the sizes of these zones, as well as how many % of the original asset the LODs should have in these zones. Similarly, the number of draw-calls can be controlled by grouping up assets and replacing them with a proxy, which is a common approach for large outdoor games.
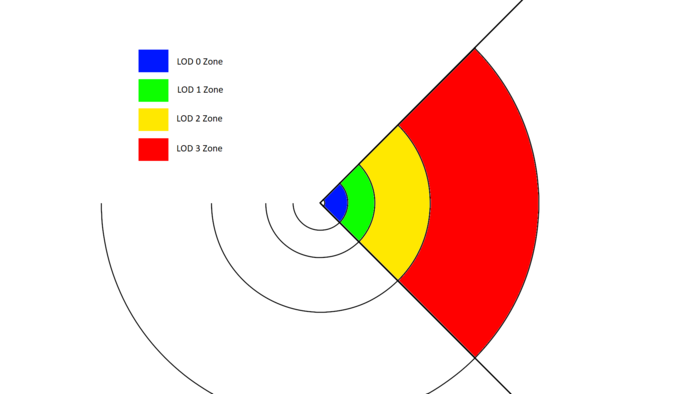
A typical approach is to have each LOD-zone start twice as far away from the camera as the previous one, and have the LODs of a zone set to 50% of the triangle-count of the previous zone.
Balancing the visual quality
The problem with reducing by percentage is that assets tolerate reduction differently. The LODs of some assets will have more triangles than they need, while the LODs of other assets will have too few. This will result in an uneven visual quality.
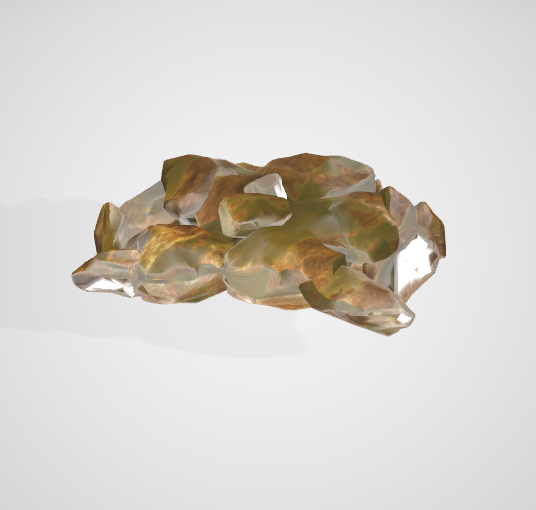
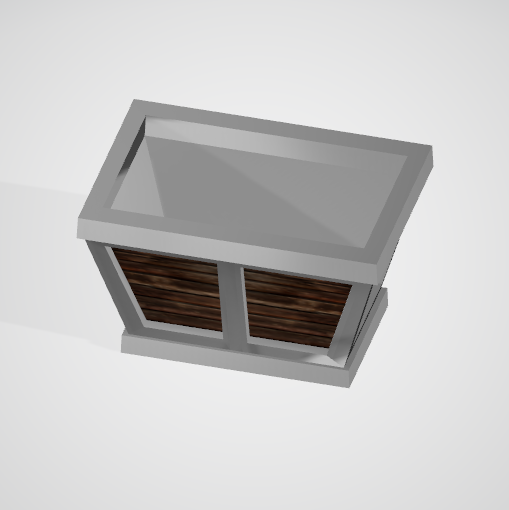
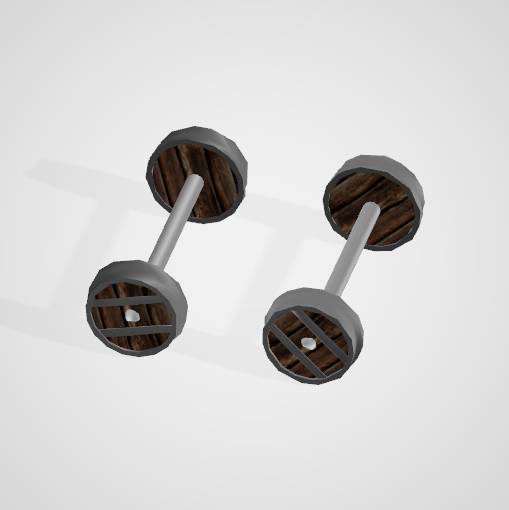
This minecart will serve as an example:
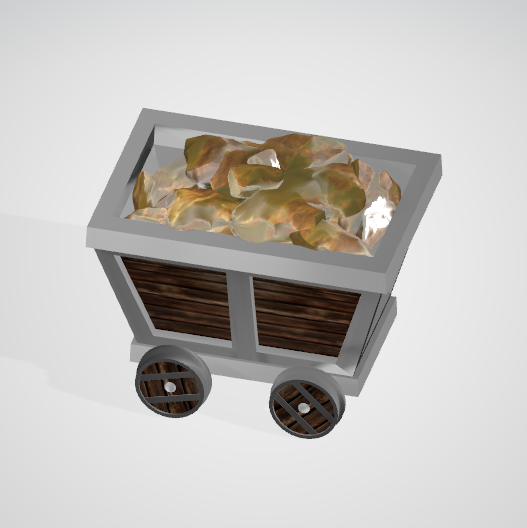
It is built up by several assets. The gold-nuggets in the cart, the cart itself, as well as the wheels underneath.
The triangle-count of the separate assets are as follows:
- Cart - 384 triangles
- Gold - 27500 triangles
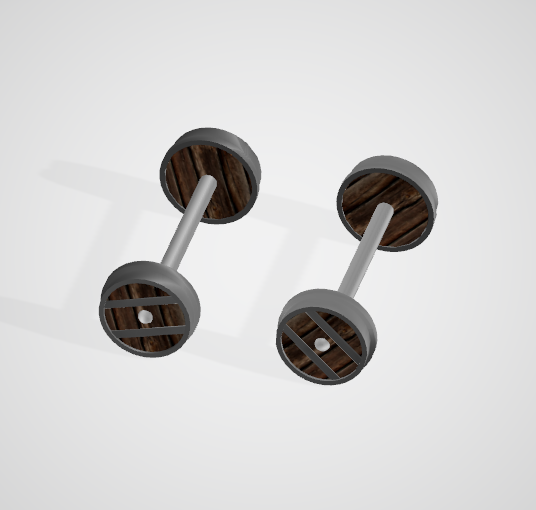
- Wheels - 6528 triangles
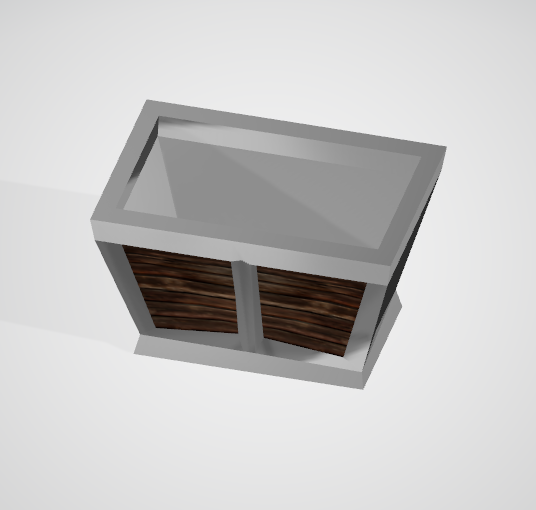
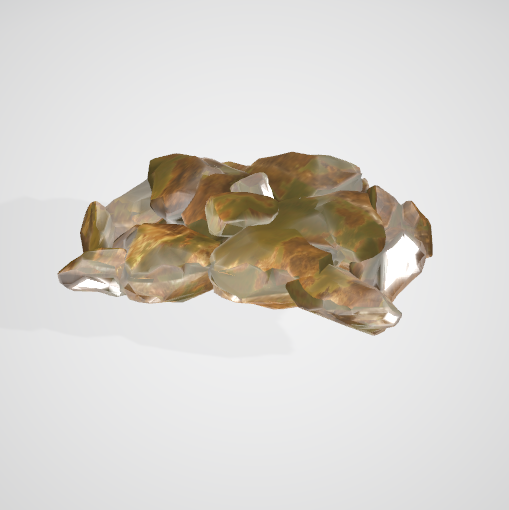
This is what happens when they are reduced to 50% and to 25%:
| 50% triangles | 25% triangles |
|---|---|
 |
 |
| 191 triangles | 96 triangles |
| 50% triangles | 25% triangles |
|---|---|
 |
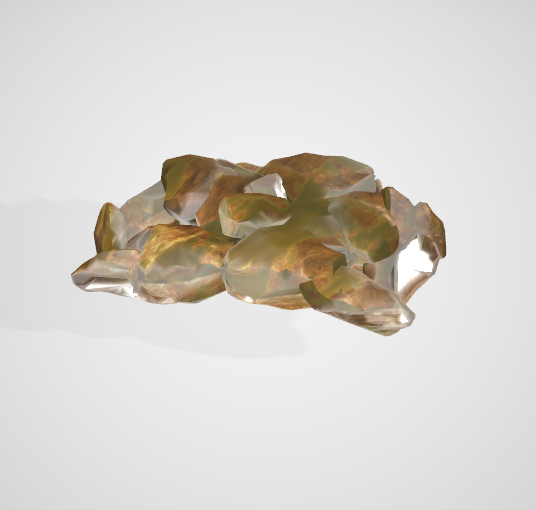 |
| 13750 triangles | 6875 triangles |
| 50% triangles | 25% triangles |
|---|---|
 |
 |
| 3264 triangles | 1632 triangles |
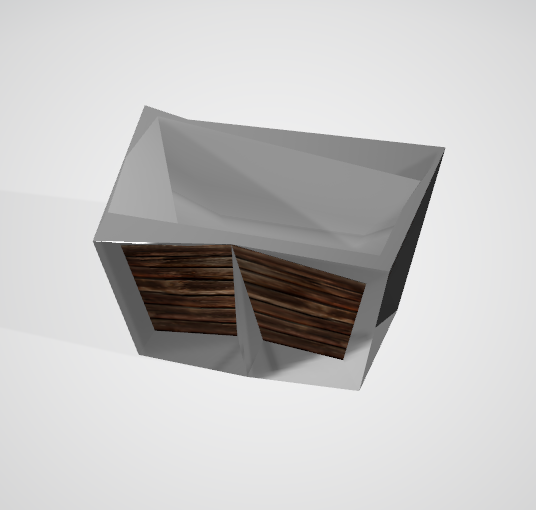
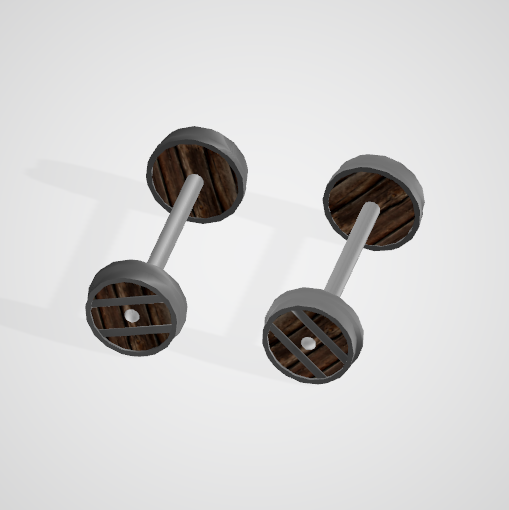
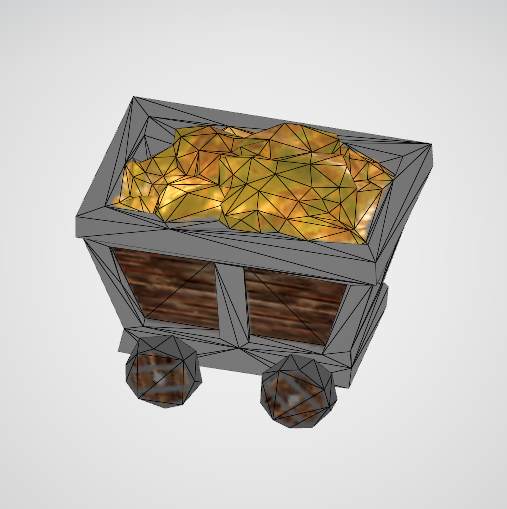
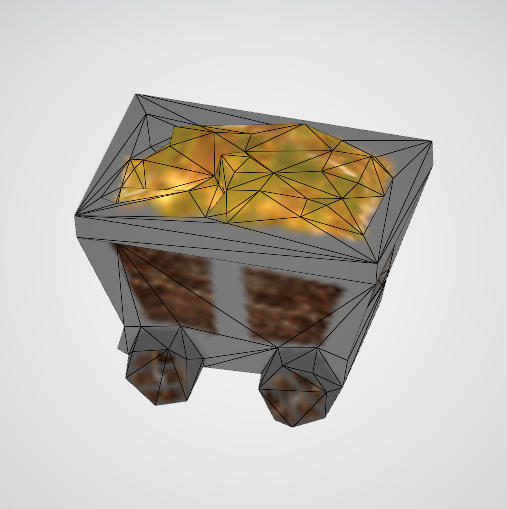
The LODs for the wheels, as well as the gold nuggets look quite nice! However, the LODs for the cart itself look atrocious. Some of the triangles on the wheels, or the nuggets would clearly have been better spent on the cart.
This is where screensize and max-deviation comes into play. Instead of reducing all LODs by 50%, we can instead use the same max-deviation value to reduce all the assets. This way the visual error will be evenly distributed among all the assets, and all that matters is that the max-deviation value used is large enough to push the triangle-count down to the desired number that is assigned to each LOD-zone.
A good starting point to find what that max-deviation number should be is to look at how big the pixels are at the distance where the LOD-switch takes place. If the surface of the LOD is kept within roughly 1 pixels distance from the original asset, it is bound to look pretty good.
Using max-deviation for Reduction
To calculate the size of a pixel in relation to an asset rendered to the screen, we need to know:
- Screen resolution
- Field of view angle
- Distance to the camera
The size of the viewing-arc where the asset is rendered is calculated by first calculating the circumference of a circle with the same radius as the distance to the rendered asset. Then with the FOV angle, we find the length of the arc.
ArcLength = Radius * 2 * PI * (FOV / 360)
After that, to get the size of 1 pixel on that viewing-arc, we take the length of the viewing arc and divide that with the screen resolution (width). The complete formula is then:
PixelSize = ArcLength / ScreenResolutionWidth
Lets say we use 10 meters as the distance to our first LOD zone, Fov 90 and a screen resolution of 1920x1080 pixels.This gives us viewing-arc that spans 15.7 meters.
Since the screen is 1920 pixels in width, we then get 15.7 / 1920 = 0.0082 meters per pixel, or 0.82 cm per pixel.
In the same way, if LOD-zone 2 is 20 meters from the camera, the size of a pixel is 1.64 cm.
Using triangle reduction with MaxDeviation target, 0.82cm for LOD1 and 1.64cm for LOD2 we get the following LODs for our separate parts:
| Max deviation 0.82 | Max deviation 1.64 |
|---|---|
 |
 |
| 356 triangles | 354 triangles |
| Max deviation 0.82 | Max deviation 1.64 |
|---|---|
 |
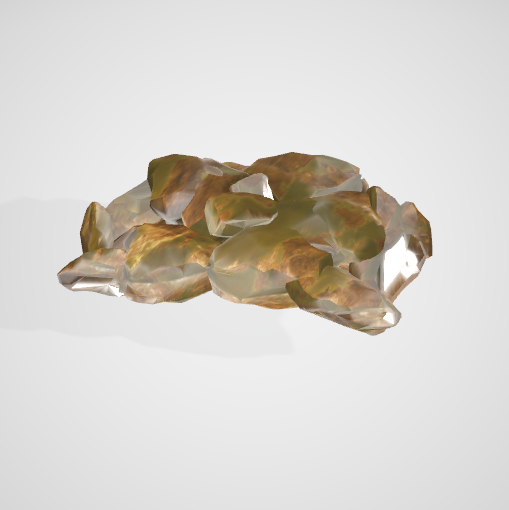 |
| 10848 triangles | 6102 triangles |
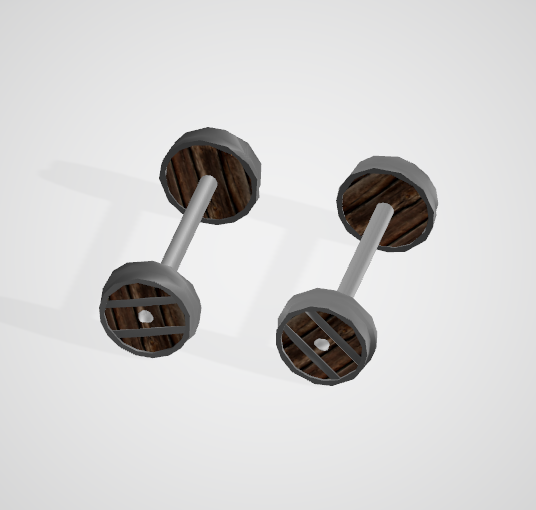
| Max deviation 0.82 | Max deviation 1.64 |
|---|---|
 |
 |
| 2278 triangles | 1698 triangles |
This puts the total of the combined minecart at 39% triangles (LOD1) and 23% (LOD2). Both a lower total triangle-count than when using the triangle percentage target, as well as a better overall visual quality. All because of a better distribution of the triangles. However, since hardly any triangles were removed from the cart-asset, it is probably a good idea to simply not use any LODs for that asset since that would be a waste of memory, and instead only use LODs for the gold-nuggets and wheels.
Using screensize for Remeshing
For LOD-zones further away from the camera it is a good idea to start combining assets, in order to both further decrease the number of triangles, but also to decrease the number of drawcalls (at the cost of creating new textures). Simplygons Remesher uses the OnScreenSize metric. To calculate this all that is needed is the diameter of the asset, as well as the size of a pixel at the intended distance.
ScreenSize = AssetDiameter / PixelSize
Since the minecart has a diameter of 201 cm (can be found in the API by using the "Scene->GetRadius()(see below)" function), the minecart will at 10 meters from the camera cover: 201 / 0.82 = 245 pixels across.
| ScreenSize 245, 512x512 texture | ScreenSize 122, 256x256 texture | ScreenSize 61, 128x128 texture |
|---|---|---|
 |
 |
 |
| 1152 triangles | 696 triangles | 260 triangles |
Remember that these are supposed to be viewed from quite far away, and not up-close as in these images above. For these minecart assets, it is probably a good idea to use one or two LODs created from the Reducer, and then for the 3rd LOD-zone use a combined LOD created from the Remesher. But once a LOD is down to below 1k triangles, there isnt much point to have more LODs. So the LOD created for the 3rd LOD-zone may very well be the final LOD for the combined minecart.
Targeting multiple platforms, or older PCs
Instead of simply creating one set of LODs for each asset, it is a good idea to create several sets of LODs. It naturally depends on how the pipeline is set up, but having multiple sets of possible LODs for each LOD-zone is usually a good idea. When doing performance tests for the game, it might be a good idea to be able to quickly swap out all LODs created for the LOD1-zone from being created with MaxDeviation 0.82cm to instead using LODs created with, say, MaxDeviation 1.25cm. So instead of re-creating LODs when the need arises, it is better to have a large number of possible LOD-sets to choose from.
Similarly, an older console or PC might want a different LOD-setup than a newer PC or console. A high-performance PC can handle LODs with a higher trianglecount than an older PC. This can be achieved either by having the LOD-zone switch at an earlier distance from the camera, or from using a different set of LODs.
Using "Low" graphics in the game, with a lower screen-resolution might want to use LOD-set 2-5, whereas "High" graphics settings instead uses LOD-set 1-4.
All areas of the game are also different. Some game-levels, or even parts of a game-level might have different performance-requirements. This can be dealt with by setting the LOD-zones at different distances from the camera either per-level basis, or even dynamically within the same game-level. As the player approaches a high-workload area (or approaching an area where a high workload event will soon take place), the LOD-switch distance can gradually be lowered in preparation for a high-workload event.
Behavior of GetRadius() method (Updated 24/11/2021)
Currently spScene's GetRadius includes spSceneMesh, spSceneCamera & spSceneNode in its extent calculation. Which is then used in GetRadius calculation. However AssetDiameter/ or SceneRadius terms used in the above article refer to bounding radius of the processed geometry which could be a subset of what is included the spScene.
The following two uses cases will currently affect the radius of scene which will give you incorrect switch distances if you use spScene GetRadius.
- spSceneCamera is added to the scene.
- spSceneMesh is added to the scene that is used as clipping geometry or visibility sampler (using selection set)
If you have one of the above cases. Release after 9.1.39000.0 have global setting available that you can enable to exclude spSceneCamera from extent and radius calculations.
sg->SetGlobalBoolSetting( "IgnoreCameraInExtentsCalculation", true );
However for (2) you would need to do the book keeping on your end. Mainly the following
- Use spScene's SelectNodes to seelct spSceneMesh's. Remove any meshes that belong are part of the spSelectionSet's for clipping geometry or visibility sampling. This will give you a subset of processing set. Now you can compute the boudning sphere radius of this subset and use it as AssetDiameter.
This would be correctly addressed in 9.2 release.